In Sequitur, a device stores properties associated with one real device in your MIDI studio. For example, a Sequitur device might have a list of patch names corresponding to the actual patches in your real device. It can also store controller names, bank names, and it has a convenient icon.
Mostly devices are a convenience, but they are required before you can use the Bank / Program Change strip in a track window. Different MIDI synthesizers use different means of selecting banks of sounds; Sequitur can automate this process for you, but first you must have a device that understands the correct bank change commands for your synthesizer.
A device will not affect anything until it has been assigned to a MIDI port in your studio. See The Studio for more information.
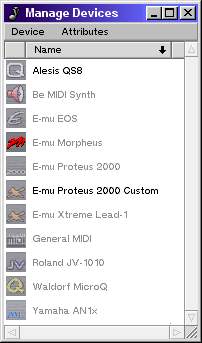
This window, available from the Windows->Devices menu item of any song window, displays a list of all the devices installed on your system. From the Device menu you can create, modify, or delete devices.
The Manage Devices window is similar to a Tracker window, and displays a list of devices and their attributes. By default, the Manage Devices window displays the name and a short description of each installed device. The attributes are:
10.1.1. The Be MIDI Synth Device
BeOS includes a built-in MIDI synthesizer, which appears in Sequitur as the Be MIDI Synth output filter if your soundcard is supported. Sequitur also ships with a special device, the Be MIDI Synth device, that supplies this output filter with patch and controller names. Note that this is just a standard General MIDI synthesizer, so the Be MIDI Synth device is just a standard General MIDI device, but with a special icon.
10.1.2. Menu Bar
Device
10.2. Sharing Devices
Devices are stored as files on your hard drive, so they can be shared easily with other users. A device can be stored in one of two directories:
All devices located in the first folder can not be modified, and appear as light gray in the Manage Devices window. By default, all devices that ship with Sequitur are located in this read-only directory. Use the path attribute of the Manage Devices window to locate a particular device.

The Edit Device window is accessed by opening the Manage Devices window and either double-clicking an existing device or selecting Device->New. This window is divided into five pages: General, Banks, Controllers, Description and Icon. The General page contains several required pieces of information, all other information is optional.
10.3.1. The General Page
This page allows you set the device's name, manufacturer, author, and author's email. A device must have at least a name or manufacturer, and will preferably have both. Devices are uniquely identified in the system by a combination of the name and manufacturer, so it is illegal to have two devices whose names and manufacturers are both identical.
10.3.2. The Banks Page
This page allows you to define one or more banks for your device. A bank is primarily a convenience -- you can supply meaningful patch names, so program changes don't appear as simple numbers. However, banks also allow you to define a selection event, so you can easily switch between different banks.
This page has four controls: The Select banks with: menu button determines the selection event; the Bank menu button has functions for operating on banks; the tree view displays all banks and their associated data; and the text input field at the bottom is used to change the value of whatever row is currently selected in the bank tree.
10.3.2.1. The Bank Menu Button
This menu button controls bank management. Initially, a new device has no banks, so the first thing you must do is select Bank->New to create a bank. Alternatively, you can select Bank->Merge From to load in all the banks from another device (although if that device uses a different selection event, the selection information is lost). Finally, if any of the patch rows is currently selected in the bank tree, then the Bank->Paste Patch List menu item is active. This menu item expects a list of patch names in the global paste buffer, which it then pastes, in order, into the patch name list of the bank, starting with the currently selected patch. The list that you copy from should be formatted like
	Acoustic Piano
	Acoustic Bass
	Harpsichord
	etc...
10.3.2.2. Bank Selection
Bank selection events can be a hassle because different manufacturers use different combinations of control changes to change banks. The MIDI standard defines a bank selection as controller 0 (MSB) followed by controller 32 (LSB), with the values of each controller varying between devices. This is already painful enough, but not all devices follow this standard -- some use only controller 0, or only controller 32.
Obviously, you need to determine what standard your device follows for bank selection. After you know this, you need to determine what values your device uses to select each bank. With this information, you can now define bank selection events.
First, select the appropriate choice in the Select banks with: menu field. Now, expand one of your banks in the bank list. You will see an item labeled 'Selection.' Expand it. When you expand the item, you will see that it matches the choice you made in the Select banks with: field -- if your selection was Controllers 0, 32, then you see a Controller 0 item and a Controller 32 item. Click on one of the controllers and enter the appropriate value in the Controller value: text field below the banks list.
10.3.2.3. Patch Numbering
All banks have a row called Number patches from, found beneath the Patches row. If you select this row, the value field at the bottom of the banks page is labelled First number:, and whatever number you enter will determine the number of the first patch in the bank. For example, this value is by default 0, so patches will be numbered 0 to 127 throughout Sequitur (in this bank). However, some devices number patches from 1 to 128; by setting this value to 1, the patches are now numbered correctly.
10.3.3. The Controllers Page
This page allows you to define controller names for the 128 available MIDI control change events. Click on any row and type in a controller name in the Value: text field. The MIDI standard specifies what many of the controllers should
do, and these values are provided by default.
10.3.4. The Description Page This page allows you to annotate the device with any necessary information.
10.3.5. The Icon Page Devices can optionally have an icon that appears on whatever input or output filters they are assigned to. This icon editor is an extremely simply paint program provided as a convenience for touching up icons.
If you are creating a new device, the first thing you need to do is select Icon->New from the menu field to make a new icon. The only tools available are a pencil for drawing and an eye dropper for reading the current color. The knob to the right of the colour control specifies the alpha level used by the pencil.
The Copy and Paste menu commands can be used to transfer the icon to and from a better paint program. Copy and paste works fine with Be's QuickRes application, and may work with other BeOS paint programs.
The Flip Horizontally and Flip Vertically menu commands mirror the icon around the x and y axis, respectively.
The Fill with Alpha command fills every pixel in the icon with at most the current alpha value (if the pixel's alpha is already below the current alpha, it is left alone). The devices that ship with Sequitur are all mostly transparent (the foregrounds have all been given an alpha value of 110). This is purely an aesthetic decision, but if you choose to follow this pattern this menu option is very helpful.


