GENERATING OSC FILES FOR ZEBRA 2
This example will show you how to use Temper to generate files that can be used in u-he's Zebra 2 synthesizer. If you don't have Zebra 2 this example will still provide the basics on working with the shape editor.
GETTING STARTED
Before you begin, make sure you have the Zebra 2 device assigned to the Zebra VST. Do this by creating a new Zebra 2 track (Tracks->Add MIDI Track->(Zebra 2)), selecting the VST for Zebra 2 in the new track, and choosing the included device by clicking on the Device button in the Studio section and choosing u-he->Zebra 2.
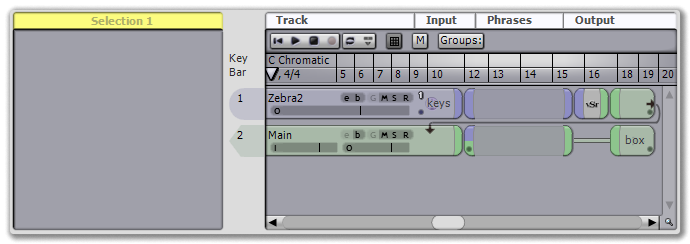 |
| create a Zebra 2 track... |
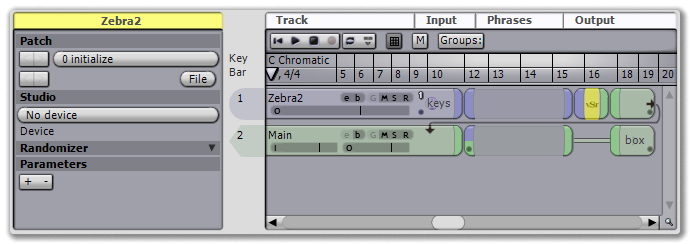 |
| ...select the Zebra 2 VST... |
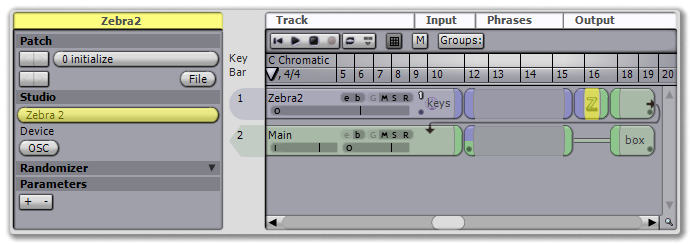 |
| ...and assign the Zebra 2 device |
Once you've set your Zebra 2 VST to use the Zebra 2 device, a new button should appear beneath the Device menu labeled "OSC." Pressing it gives you a list of all the shapes in the system, and selecting one will write it to a Zebra 2 .h2p file. Before you do that, though, you'll want to define an appropriate shape.
DEFINING THE OSC
Click the Shapes tab button in the browser title to access the shape editor. This will open on the shape manager, showing you a list of all the shapes in your system.
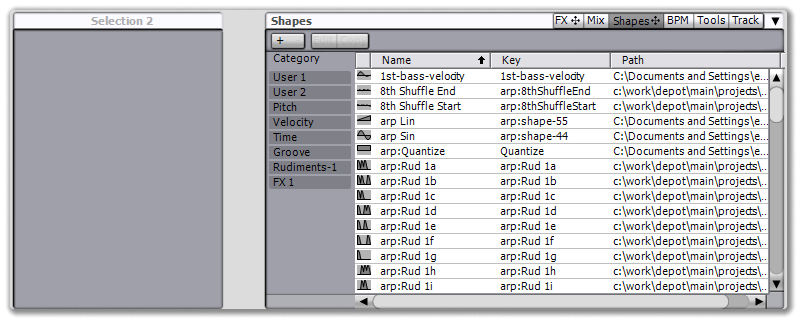 |
| the shape manager |
Click the + button to add a new default shape and give it a useful name in the left panel inspector.
 |
Now click the Edit button to begin editing the shape structure.
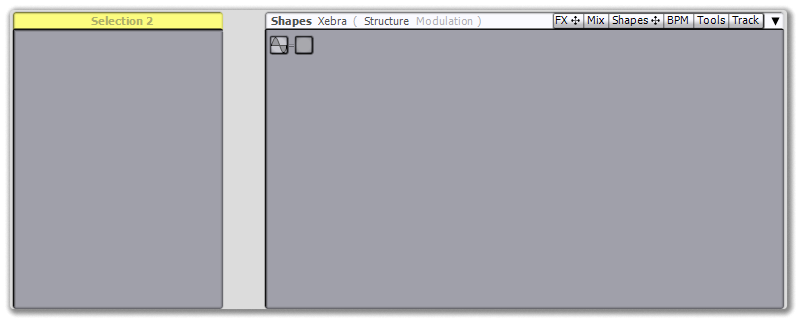 |
The structure shows a chain of two basic shapes, a sine wave feeding into an empty slot. Temper will take the first 16 shapes it finds and create a Zebra OSC file from them, but there's an important issue to note: Temper treats these complex shapes as a single object, while Zebra uses the individual shapes as separate waves in its 16 slot wave table. The difference means that while Temper displays the 'final' shape, Zebra is only interested in the pieces. Let's take a more concrete example: Right click on the empty slot and select Pink Noise from the menu. Now, when we select the Pink Noise shape we just added to the second slot, we see a preview that looks like this:
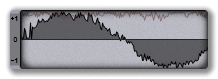 |
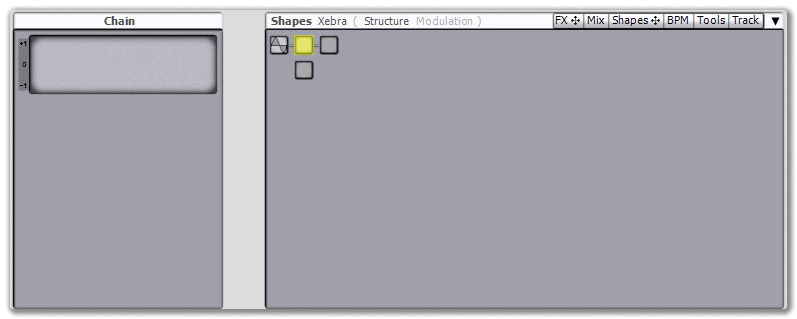
Note that their are two shapes being drawn: The dark, "final" shape, a composite of the sine wave in slot 1 and the pink noise in slot 2, and a lighter pink shape, which displays just the pink noise for slot 2, the currently selected shape. The Zebra OSC for table 2 will be the pink noise shape, not the composite shape. If you want the Zebra OSC to be a noisy sine wave, you need to actually create a noisy sine wave in slot 2. Try this: Right click on slot 2 and select Chain.
 |
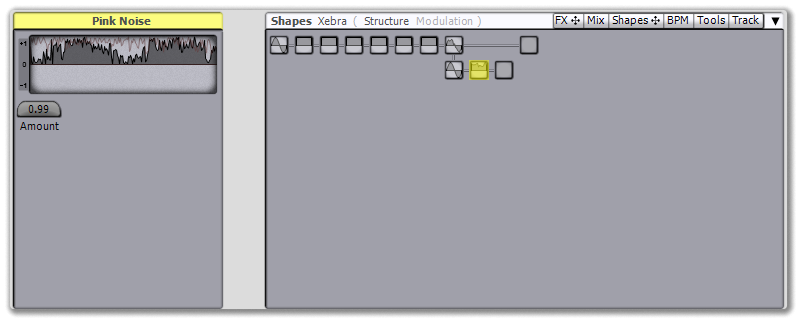
Now right click on the first slot in the second row and select Sine, then select Pink Noise for the next slot over.
 |
Now you've got a complete noisy sine wave shape in slot 2 of row 1, and this is what Zebra will have in table 2 of its OSC.
There's one more thing to know about: Empty shapes. Placing empty shapes between non-empty shapes will create interpolated tables. For example, you can create an 8 table OSC by placing a shape on slot 1, another shape on slot 8, and selecting the Empty shape for all the slots in between.
 |
WRITING THE OSC
Once you're satisfied with your shape, make sure to leave the shape editor in the browser. For example, by clicking on the Shapes tab to bring you back to the shape manager. Leaving the editor causes the shape to be saved.
Back in the inspector for your Zebra 2 VST, click on the OSC button.
 |
This opens a menu with a list of all your shapes. Select the one you just created, then choose a file name and the new .h2p file is created. (Here's the one we just made: shape and OSC files) Place it in the correct Oscillator directory for Zebra 2 and load it from an OSC module.